


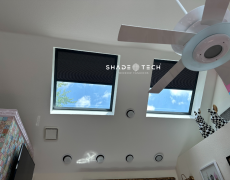






A motorized shade that stops one inch too high can turn a bright Dallas afternoon into a daily frustration. A shade that lowers too far can strain its fabric, bottom bar, or motor. Knowing how to program shade limits gives your window treatments the precise travel they need for privacy, glare control, UV protection, and dependable smart-home operation.
Shade limits are not a cosmetic adjustment. They define the exact upper and lower stopping points of a motorized shade. When they are set correctly, the shade aligns cleanly with the window, protects the system from unnecessary stress, and responds consistently to wall controls, remotes, voice assistants, and scheduled automations.
What shade limits control
Every motorized shade has an upper limit and a lower limit. The upper limit tells the motor where to stop when the shade opens. The lower limit tells it where to stop when it closes. On some systems, a third setting may control a favorite position, often called a my position or intermediate limit.
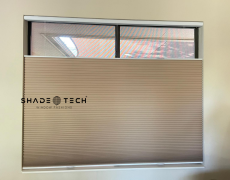
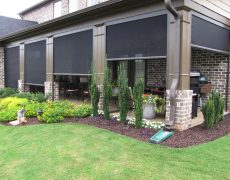
For roller shades, the lower limit determines whether the fabric reaches the sill, stops just above it, or leaves a deliberate gap for airflow or hardware clearance. For cellular, Roman, and dual shades, proper limits also help maintain an even stack and reduce the chance of fabric bunching. Outdoor screens require especially careful settings because excess travel can put avoidable tension on the screen and guide system.
The right stopping point depends on the product, mounting style, window geometry, and the homeowner’s priorities. A bedroom shade may need maximum closure for privacy. A west-facing living room may stop slightly above the sill to avoid contact with a stone ledge while still controlling heat and glare.
Before you program shade limits
Start by identifying the control system. Most motorized shades are adjusted through one of three methods: a handheld remote, buttons on the motor head, or a manufacturer’s app. The exact button sequence varies by motor brand and product line, so do not assume a sequence from another shade will work on yours.
Make sure the shade has a clear path before changing anything. Remove objects from the sill, move furniture away from the fabric, and check that the shade is not catching on a window crank, handle, or trim detail. For exterior screens, inspect the tracks and bottom bar for debris before operating the system.
It also helps to confirm that the shade has sufficient power. A low battery can create inconsistent movement that looks like a limit-setting problem. If multiple battery-powered shades are responding slowly, replace or recharge batteries before recalibrating their positions.
Finally, photograph or note the current setting if the shade is close to correct. This makes it easier to return to a workable position if you accidentally erase the existing limits.
How to program shade limits step by step
The sequence below describes the standard logic used by many motorized shade systems. Your remote labels, app screens, and confirmation movements may differ, but the process is generally the same.
Put the motor into programming mode
Select the individual shade you want to adjust. If you use a multichannel remote, confirm that you are on the correct channel before pressing any programming button. This matters in rooms with several shades, where an accidental command can reset a neighboring window treatment.
Most systems enter programming mode when you press and hold a small program button on the remote, motor, or battery wand. The shade will usually jog briefly, moving up and down a small amount, to confirm it is ready. A jog is a confirmation signal, not a fault.
If the shade does not respond, do not keep pressing buttons at random. Verify power, remote pairing, and channel selection first. Repeated commands can unintentionally change settings or disconnect the shade from its remote.
Set the upper limit first
Use the raise and lower controls to move the shade to its ideal open position. For an inside-mounted roller shade, the fabric should roll up evenly without pulling into the mounting brackets. For many products, a small amount of visible fabric near the tube is normal. Trying to force every last inch upward can over-rotate the motor and create uneven fabric wrap.
Once the shade is in position, save the upper limit using the designated confirm or stop button. The motor should jog again to acknowledge the setting.
Check the upper limit by lowering the shade several inches, then raising it fully. Watch for contact with the fascia, cassette, valance, or mounting hardware. If the bottom bar rises into an obstruction, lower the upper limit slightly and save it again.
Set the lower limit with the window in mind
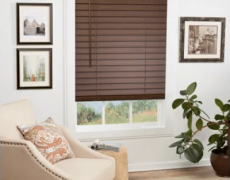
Lower the shade slowly to the intended closed position. The objective is controlled coverage, not necessarily the lowest physical point available. On a sill-mounted window, leave enough clearance to prevent the bottom bar from pressing against a ledge, crank, or decorative trim.
For privacy shades, stand outside or view the window from an angle if possible. A small gap may be acceptable in a living area but not in a bathroom, nursery, or street-facing bedroom. With solar screen fabrics, remember that the desired lower limit may prioritize glare reduction and heat control rather than total blackout.
Save the lower position, then raise and lower the shade through a full cycle two or three times. A setting that looks correct during programming can reveal a slight issue once the fabric has rolled and unrolled under normal tension.
Save and test the favorite position
If your motor supports a favorite position, this is worth setting for high-use rooms. A favorite position can lower a living room shade to the point that blocks direct afternoon sun while preserving an exterior view. In a media room, it may be the position that reduces screen glare without darkening the entire space.
Program this only after the upper and lower limits are correct. Favorite positions rely on those endpoints, and they will not perform predictably if the primary travel range is wrong.
Common limit-setting problems and what they mean
A shade that stops at different points each time may have low battery power, an obstruction, or a fabric alignment issue rather than a poorly saved limit. Check the simplest causes first. If the shade is hardwired, make sure the circuit and control connection are functioning correctly before attempting a reset.
If the shade moves in the wrong direction, the motor direction may need to be reversed. This is separate from setting limits. Reversing direction is common after certain resets or when a remote has been paired incorrectly.
If the shade will not enter programming mode, it may be locked, assigned to a group-only channel, or paired to a hub that requires app-based adjustments. Some premium smart-shade systems deliberately restrict local programming to avoid accidental changes in commercial spaces, clinics, restaurants, or homes with many automated openings.
When a shade loses both endpoints after a power interruption or battery replacement, consult the product-specific instructions before resetting it. A full factory reset can remove remote pairings, room assignments, scenes, and smart-home integrations. It is often more work than simply restoring limits.
Program limits before building smart-home routines
A voice command or scheduled routine can only be as accurate as the shade’s physical endpoints. Set and test limits before adding the shade to Alexa, Google Home, Apple Home, or a Matter-enabled platform. Otherwise, a routine such as “close shades at sunset” may consistently leave a light gap or drive the shade farther than intended.
For North Texas homes, consider creating routines around actual comfort needs. West-facing windows may close to a glare-control position in late afternoon, while east-facing bedroom shades can open gradually in the morning. Large contemporary windows often benefit from different limits or favorite positions by room because sun angle, furnishings, and privacy needs are rarely identical throughout the house.
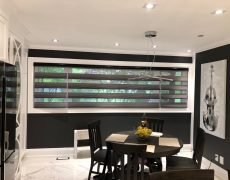
Commercial settings deserve the same precision. A restaurant may need shades to stop at a consistent visual line across a wall of glass. A medical clinic may need reliable privacy coverage at treatment-room windows. These details affect both appearance and daily operations.
When professional adjustment is the better choice
Simple limit changes are manageable when the shade is accessible, the controls are clearly identified, and the system is operating normally. Professional service is the safer route when shades are installed at height, integrated into a multiroom automation system, mounted behind trim, or showing signs of binding and uneven travel.
Custom systems require a broader view than a button sequence. The installer should check bracket alignment, fabric roll direction, motor response, sill clearance, and automation behavior together. For locally manufactured and professionally installed shades, that precision protects the clean appearance and long-term performance you invested in.
A properly programmed shade should disappear into the rhythm of the room: open when you want daylight, close when the Texas sun becomes uncomfortable, and stop exactly where it should. That is the standard worth setting before the next bright afternoon tests it.
