

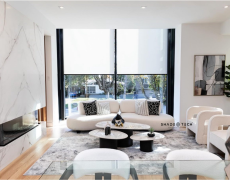
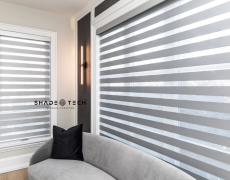
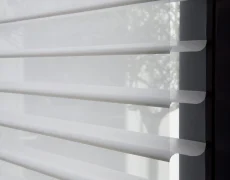
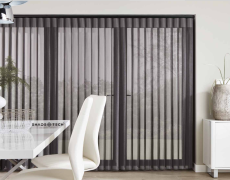







A motorized shade should disappear into the room’s design, not leave a visible cord climbing the wall to an outlet. That is why a guide to hardwired shade wiring starts before drywall, paint, trim, or window treatment selections are finalized. Proper power planning gives Dallas-Fort Worth homeowners a cleaner installation, dependable automation, and a better long-term result on large windows, high ceilings, and hard-to-reach openings.
Hardwiring is especially valuable where shades will operate daily to manage glare, heat gain, privacy, and UV exposure. It removes battery replacement from the ownership experience and keeps the window wall visually intentional. The details matter, though: the right wiring plan depends on the shade system, the window construction, control method, and whether the project is new construction, a remodel, or a finished home.
What hardwired shades actually require
“Hardwired” can describe two related but different parts of a motorized shade system. The first is a conventional 120-volt electrical feed brought to a dedicated location near the window. The second is low-voltage wiring that runs from a centrally located power supply to one or more shade motors. Both approaches can provide permanent power without a plug-in cord, but they are designed, installed, and serviced differently.
Many residential motorized shade systems use low-voltage DC motors. In that setup, a licensed electrician provides line voltage to an approved power supply, while low-voltage cable carries power to each shade. Other systems use a line-voltage motor or a manufacturer-specific hardwire connection. The motor brand, shade size, fabric weight, and control platform determine what is appropriate.
This distinction is more than technical language. It affects where power supplies can be located, what must remain accessible for service, how many shades can share a circuit, and how the installation coordinates with framing and trim. Never select cable type, wire gauge, or circuit capacity from a generic diagram alone. The motor manufacturer’s specifications and local electrical code should control the final design.
Guide to hardwired shade wiring: plan before the walls close
The most efficient time to plan shade wiring is during architectural design or the electrical rough-in stage. At this point, the installer, electrician, builder, and window treatment specialist can coordinate locations before access becomes expensive. For remodels and completed homes, it is still often possible to conceal wiring, but routing options depend on attic access, wall construction, ceiling details, and the location of the electrical panel.
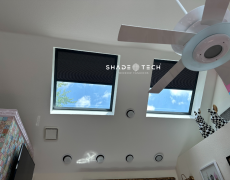
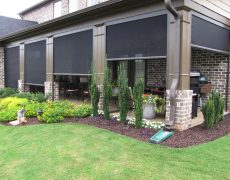
Start with the window treatment plan, not just the window schedule. A room with three adjacent windows may use three independently operated shades, a single multi-band system, or shades grouped for one-touch control. Those decisions affect motor placement and power requirements. A corner room, a two-story great room, or a patio opening may also need special consideration because the motors can be far from an accessible route.
A well-coordinated plan identifies the mounting condition at every opening. Inside-mounted roller shades typically place the motor in the headrail or roller near the top of the window recess. Outside-mounted shades may need power above the opening, behind a fascia, or within a recessed pocket. If the home includes concealed shade pockets, the pocket needs enough depth for the selected roller, fabric roll, brackets, wiring path, and future service access.
Choose power locations with service in mind
A hidden power supply is desirable. An inaccessible power supply is not. It may eventually need inspection, replacement, or troubleshooting, so it should be located in an approved accessible location such as a nearby closet, cabinet, equipment room, accessible soffit, or other planned service area.
At the window itself, wiring should exit where the shade manufacturer and installer expect it. A wire emerging on the wrong side of the roller can interfere with brackets, fascia, or fabric movement. This is a common reason to involve the shade specialist before the electrician completes rough-in work.
For finished homes, a carefully placed recessed power location can be an effective solution. The best option depends on the construction and the shade system. A visible surface raceway may be practical in certain commercial environments, but it is rarely the preferred finish for a high-end residence.
Hardwired, battery, and plug-in shades: the real trade-offs
Hardwired shades are not automatically the right answer for every window. Battery-powered shades are useful where walls are complete, wiring access is limited, or the shade operates infrequently. Modern battery systems can be refined and reliable, particularly for a small number of openings.
However, battery operation adds a maintenance task. Battery life varies based on shade size, usage frequency, fabric weight, temperature, and the motor platform. A large bank of sun-facing shades that raises and lowers on a schedule can make hardwired power the more practical choice.
Plug-in systems offer permanent power with less construction work, but their success depends on outlet placement. If the outlet or cord is visible, the finished installation can look compromised. Plug-in power can work well in utility spaces, commercial back offices, or certain closets. In formal living areas, primary bedrooms, and rooms with expansive glass, concealed hardwired power usually produces the more polished result.
The investment also depends on timing. Wiring during construction is typically straightforward compared with opening and repairing finished walls later. For a planned renovation or new home, hardwiring is often a high-value decision. For one isolated window in a completed space, a battery or concealed plug-in solution may be more sensible.
Design the controls around daily living
Power is only one layer of the system. A hardwired shade can be controlled with a wall keypad, handheld remote, app, voice assistant, automated schedule, or a whole-home control system. The right control approach should reflect how the room is used.
For example, east-facing bedroom shades may lower automatically before sunrise and rise on a preferred morning schedule. A west-facing living room can close shades during peak afternoon solar exposure, helping reduce glare and heat while preserving the room’s comfort. In a media room, a wall keypad can lower multiple shades with one press. Restaurants, medical clinics, and conference spaces may benefit from timed scenes that create consistency without asking staff to adjust each opening manually.
Compatibility should be confirmed early if the property uses Alexa, Google Home, Apple HomeKit, Matter, or a professional smart-home platform. Not every motor and gateway supports every ecosystem in the same way. Reliable automation also requires thoughtful placement of bridges, repeaters, and network equipment where applicable. Hardwired power prevents battery-related interruptions, but it does not replace proper smart-home commissioning.
Grouping and zoning improve comfort
Treat each facade as its own solar condition. South- and west-facing windows in North Texas often need more active heat and glare management than shaded interior-facing windows. Grouping shades by room, exposure, or activity makes automation useful rather than excessive.
A great room may need separate zones for clerestory windows, patio doors, and lower-level windows. This lets homeowners reduce harsh afternoon sun without darkening the entire space. In commercial settings, zoning helps maintain a polished appearance across large window banks while allowing teams to respond to changing daylight.
Coordinate with the right professionals
Hardwired shade projects touch several trades: electrical, framing, drywall, millwork, automation, and window treatments. The goal is not to make every contractor an expert in shade motors. It is to give each professional a clear, coordinated scope before installation begins.
A qualified shade specialist should verify window measurements, mounting surfaces, roller orientation, pocket dimensions, motor locations, control preferences, and fabric selection. The electrician should provide code-compliant power based on the approved system requirements. If the project includes a builder, designer, or smart-home integrator, they should receive the final wiring and control plan early enough to avoid field changes.
ShadeoTech approaches this coordination from the finished installation backward: how the shades must look, operate, and integrate once the room is complete. That process helps prevent a common disappointment – beautiful custom shades forced into a compromised installation because the power location was decided too late.
Common wiring mistakes that affect the finished result
The most expensive mistakes are usually planning mistakes. Installing a power source behind an immovable header, placing wire exits where brackets need to sit, or failing to reserve adequate shade-pocket clearance can require avoidable rework. So can assuming every opening needs the same wiring approach.
Another issue is underestimating service access. Motors are durable components, but any mechanical or electronic system may eventually require adjustment. A concealed installation should still allow a trained technician to remove the shade, reach connections, and service power components without demolishing finished trim.
Finally, do not treat hardwired shades as a standalone electrical add-on. Fabric openness, color, window orientation, and automation schedules all influence the actual comfort and energy-control benefits. A darker fabric may offer more glare control but affect views differently. A more open weave can preserve daylight and visibility while providing less privacy at night. The wiring makes the system dependable; the shade design makes it perform for the room.
The best time to finalize hardwired shade wiring is before the details become expensive to change. Bring the shade plan into the construction conversation early, verify the system requirements, and leave access where future service belongs. The payoff is simple: custom shades that look built into the home, respond when needed, and keep doing their job long after the walls are finished.
