

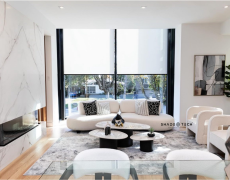
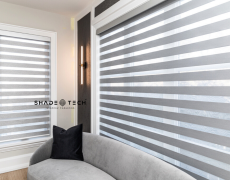
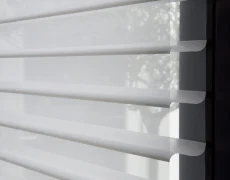
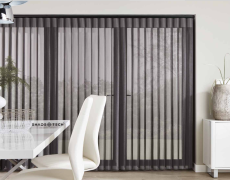







A custom shade project starts well before an installer arrives with tools and finished products. When you prepare for shade installation thoughtfully, the result is cleaner sightlines, more accurate fit, dependable motorization, and less disruption to your household. That matters in Dallas-Fort Worth homes, where expansive glass, high ceilings, intense western sun, and open-concept layouts put window treatments to work every day.
Custom shades are not a one-size-fits-all purchase. The window opening, mounting surface, fabric selection, control method, and surrounding architecture all affect the final result. A little preparation gives your design and installation team the information they need to build a system that performs as well as it looks.
Start With the Room’s Real Needs
Before measurements are taken, define what each room needs from its shades. A south-facing living room with floor-to-ceiling windows may need solar fabric to reduce glare and heat gain while preserving daytime views. A bedroom may call for room-darkening shades, or a layered solution that combines privacy and light control. In a media room, the priority could be reducing screen glare without making the space feel closed in.
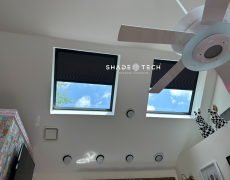
Consider how the room is used at different times of day. Morning sun in a kitchen, late-afternoon glare in a home office, and nighttime privacy in a bathroom are separate performance needs. It is also helpful to identify the windows that are difficult to reach. Tall stairwell windows, clerestory glass, and windows behind furniture are strong candidates for motorized shades because daily manual adjustment is impractical.
For commercial spaces, the questions are similar but more operational. Restaurants may need sun control that keeps guests comfortable without eliminating street visibility. Medical clinics often need dependable privacy and glare reduction in exam rooms and reception areas. Builders and contractors should identify whether shades need to be installed before final turnover, coordinated with millwork, or integrated into a broader smart-home scope.
Clear Access Before Shade Installation
Installers need safe, direct access to the windows and the mounting area above them. This does not mean a room must be empty, but moving fragile items, small decor, and furniture away from the work area protects your belongings and gives the crew room to work precisely.
Aim for a clear path from the entry to each installation room. If a sofa, desk, or bed sits directly beneath the window, move it several feet away when possible. For especially large or high windows, remove artwork and wall-mounted accessories near the opening. If ladders are required, the installation team will need a stable floor area and clearance around the window.
Take a close look at anything that may affect access or the finished appearance:
- Window trim, crown molding, built-in shelving, and deep sills
- Security sensors, door handles, crank handles, and window locks
- Plantation shutters or existing blinds that will be removed
- HVAC vents, ceiling fans, and light fixtures near tall windows
Mention these details during the consultation rather than assuming they are minor. A projecting handle may change the required shade depth. Decorative trim can influence whether an inside mount or outside mount delivers the best coverage. Existing treatments may need to remain in place until the new products are ready, particularly in bedrooms or street-facing rooms.
Confirm the Mounting Surface and Window Condition
Custom shades are only as dependable as the surface supporting them. Most installations are straightforward, but homes with steel framing, tile, stone surrounds, oversized trim, or unusually shallow window frames deserve early review. The right mounting approach depends on the structure behind the finished surface, not simply what is visible from the room.
Do not make last-minute modifications to trim, drywall, or paint after final measurements without discussing them first. Even a new layer of trim or a recessed detail around the window can affect clearances. If you are renovating, coordinate the shade plan with your contractor before drywall is closed or finish carpentry begins. That is especially useful for recessed pockets, concealed wiring, and large multi-shade systems.
Windows should also operate normally before installation. If a sash is sticking, a lock is broken, or condensation has damaged surrounding wood, address those issues first. Shades are designed to complement the window, not compensate for a window that needs repair.
Plan Power for Motorized Shades Early
Motorization can be powered by rechargeable battery wands, plug-in adapters, or hardwired low-voltage systems. The best choice depends on the size and number of shades, window access, aesthetic goals, and whether construction is underway.
Rechargeable battery power is an excellent option for many completed homes because it avoids opening walls and keeps the installation clean. It is particularly practical for standard-size windows that are accessible for periodic charging. Plug-in power can work well where outlets are discreetly located nearby, although cord routing and outlet placement must be considered before ordering.
Hardwired power is often the preferred approach for new construction, major remodels, high windows, and larger groups of motorized shades. It eliminates routine charging and creates a refined finished appearance, but it requires coordination with an electrician and clear specifications before walls are finished. The most elegant option is not always the most practical one, so the decision should reflect your home and maintenance preferences.
If you plan to prepare for shade installation with automation in mind, photograph outlet locations and share construction drawings when available. That lets the design team determine whether power, low-voltage wiring, or battery operation is appropriate for every opening.
Decide How You Want to Control the Shades
A motorized shade can be operated by a handheld remote, wall-mounted control, smartphone app, voice assistant, scheduled automation, or a combination of these. The right setup should feel intuitive for everyone who uses the space.
Think about daily routines. You may want bedroom shades to rise gradually in the morning, patio screens to lower before the hottest part of the afternoon, or living-room solar shades to respond to glare during dinner. Grouping shades by room or zone makes those routines easier to manage. A single command can adjust a bank of windows, while individual controls still allow flexibility when one person wants more light.
Smart-home integration requires more than choosing a voice assistant. Reliable network coverage near the shades, the preferred control ecosystem, and the location of any hubs or bridges should all be reviewed. Homes using Alexa, Google Home, Apple HomeKit, or Matter-enabled platforms benefit from planning controls as part of the broader system rather than treating shades as an isolated add-on.
Before installation day, make sure the homeowner or designated decision-maker can provide Wi-Fi details if setup is included. For commercial projects, identify who will manage user access, schedules, and any facility-wide control requirements. This avoids confusion after the physical installation is complete.
Finalize Fabric, Opacity, and Color in the Actual Light
Fabric can look dramatically different in a showroom sample than it does across a sunlit wall of glass. Review swatches in the room where the shades will be installed whenever possible. North Texas daylight can reveal undertones, weave textures, and reflectivity that are easy to miss under indoor lighting.
Openness factor matters with solar shades. A more open weave generally preserves a clearer outward view, while a tighter weave offers greater glare and privacy control. The trade-off is visibility and light transmission. In rooms with direct sun exposure, the fabric should be selected for thermal comfort and screen glare, not color alone.
For blackout applications, ask where light gaps are acceptable and where they are not. A standard blackout roller shade blocks light through the fabric, but light can still enter around the sides unless the design includes side channels or a more enclosed system. Bedrooms, nurseries, and media rooms often justify the added planning.
Communicate Site Details Before the Crew Arrives
A professional installation runs best when practical site information is shared in advance. Let the team know about gated access, parking limitations, pets, alarm systems, elevator reservations, or jobsite safety rules. In a high-rise residence or commercial building, confirm loading procedures and access hours ahead of time.
If the project includes removal of existing treatments, clarify which items should be discarded and which should be retained. If you have recently painted, installed new flooring, or completed other work near the windows, mention it so the crew can take appropriate precautions.
ShadeoTech’s local manufacturing and installation process is designed around precise field conditions, not generic window sizes. Clear communication allows the team to protect finishes, install with confidence, and calibrate motorized systems correctly from the start.
The best preparation is simply being ready to make informed decisions before production begins. Give each room’s light, privacy, power, and control needs the attention they deserve, then let the finished shades do what they were designed to do: make your home or business more comfortable every day.
