


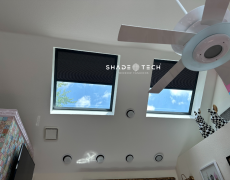


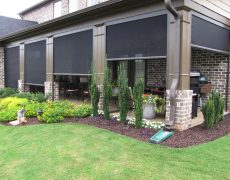

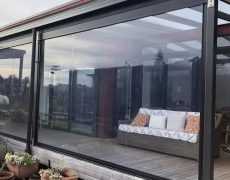



A roller shade can look perfectly tailored or noticeably off by less than half an inch. On the wide, sun-facing windows common across Dallas-Fort Worth, small measurement errors can create side-light gaps, interfere with trim, or prevent a motorized shade from sitting correctly. Learning how to measure roller shades starts with choosing the right mounting approach, then recording dimensions in the format your shade manufacturer requires.
A steel tape measure, a pencil, and a notepad are usually all you need. The more difficult part is recognizing where the window opening changes, where obstructions matter, and when a clean outside mount will outperform an inside mount. For premium custom shades, measurements are not merely dimensions. They determine light control, privacy, heat reduction, and the finished appearance of the room.
Start With the Mount Type
Measure only after deciding whether the shade will mount inside the window opening or on the wall, trim, or ceiling outside it. The two approaches use different measurements and solve different design problems.
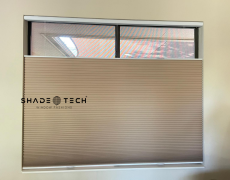
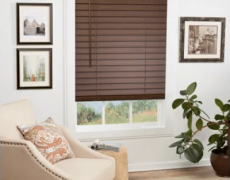
An inside mount places the roller shade within the window recess. It delivers a built-in, architectural look and preserves the visibility of decorative trim. It is often the preferred choice for deep, square windows with enough unobstructed depth for the selected shade system.
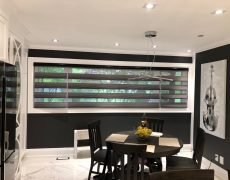
An outside mount places the shade above and beyond the opening. This option is often better when windows are shallow, out of square, fitted with cranks or handles, or need stronger room-darkening performance. By extending fabric past the glass, an outside mount can reduce the light that naturally leaks around a roller shade’s sides.
For motorized roller shades, mount selection also affects power planning. A battery tube, plug-in motor, hardwired power connection, fascia, and dual-shade system can each require different clearances. Confirm the selected product’s specifications before finalizing any numbers.
How to Measure Roller Shades for an Inside Mount
Inside-mount measurements must reflect the actual opening, not the glass size and not the size of an existing blind. Use a steel tape measure and measure to the nearest 1/16 inch. Fabric tapes can bend and introduce avoidable error.
Measure the width in three places
Measure the inside width at the top, center, and bottom of the opening. Write down all three measurements. Older homes, painted wood casings, drywall returns, and even newer construction can vary enough that a single width measurement is misleading.
For most inside-mounted roller shades, the narrowest width is the controlling measurement because it is the tightest point the hardware must fit through. Do not subtract an amount on your own unless the manufacturer specifically instructs you to do so. Custom shade systems already account for the required production tolerances, bracket dimensions, and fabric deductions.
The finished fabric is narrower than the ordered width on nearly every roller shade. That difference allows the roller tube, clutch or motor, and brackets to operate. It also means an inside-mounted shade will never seal edge to edge like a framed window insert. If complete darkness is the priority in a bedroom or media room, consider an outside mount, side channels, or a layered shading design.
Measure the height and depth
Measure the opening height at the left, center, and right. Record the longest height unless the manufacturer provides a different instruction. The shade needs enough length to cover the full opening at the tallest point.
Then measure the available depth from the front edge of the opening to the first obstruction. Check for window handles, locks, screens, protruding tile, mullions, alarm contacts, or any trim detail that could contact the shade as it lowers. Depth requirements vary by roller diameter, bracket type, fabric weight, cassette, and motorization package.
Also determine where the brackets will sit. An inside mount may be flush with the front of the opening, partially recessed, or set farther back. A recessed installation can look exceptionally clean, but only if the window depth accommodates the shade and leaves room for handles or tilt-in sash operation.
Check whether the opening is square
Measure both diagonals of the opening from corner to corner. If the diagonal measurements differ noticeably, the opening is out of square. This does not always prevent an inside mount, but it can make a perfectly straight shade look uneven against a slightly crooked opening.
When the opening is significantly out of square, an outside mount often creates a cleaner visual frame. It also gives the installer more flexibility to position the shade level, even when the window itself is not.
Measuring for an Outside Mount
Outside mounts are more forgiving than inside mounts, but they still demand intentional planning. The goal is to select a coverage area that blocks the view or light you want to control while leaving enough room for brackets, fascia, and nearby architectural details.
Measure the width you want the entire shade system to cover. Start at the outer edge of the opening or trim, then add overlap on each side. For standard light filtering and privacy, 2 to 3 inches of overlap per side is often effective. For blackout fabrics or rooms with intense morning and afternoon sun, more overlap can improve performance when wall space allows.
Measure from the intended top of the bracket location to the point where you want the fabric to stop. A shade may end at the sill, extend below the sill, or run to the floor for tall contemporary windows and doors. For patio doors, verify that the shade will clear the handle and that the bottom rail will not strike the threshold.
Above the opening, allow room for the bracket height and any decorative cassette or fascia. If you want the shade to roll fully above the glass and preserve the view when open, measure the available space between the top of the window and the ceiling or crown molding. Large roller shades, especially blackout or motorized models, have larger roller tubes and need more stacking space than a basic manual shade.
Do not assume existing trim is strong enough to support a wide shade. Solid wood trim can be suitable, but hollow decorative elements, thin returns, and drywall may require different fasteners or a wall-mounted approach. Professional installation is particularly valuable for oversized windows, high ceilings, and heavy dual-roller systems.
Account for What the Tape Measure Cannot Show
A correct width and height are only part of a successful shade project. Before ordering, look at how the room works throughout the day.
In North Texas, west-facing glass can drive substantial afternoon heat gain. A solar screen fabric may preserve a view while softening glare and UV exposure, whereas a blackout fabric provides stronger light control but reduces outward visibility. The right choice depends on whether the room is a living area, nursery, home office, bedroom, restaurant dining space, or medical clinic.
Consider furniture placement and window access as well. A shade behind a deep sofa may be easy to automate but hard to operate manually. A motorized system can be scheduled to lower before peak sun, then raise at sunset without anyone reaching across furniture. For smart-home projects, identify outlet locations, hardwire access, Wi-Fi coverage, and the control platform early. Alexa, Google Home, Apple HomeKit, and Matter-compatible environments may call for different motor and hub planning.
For paired or grouped windows, measure every opening independently. Windows that appear identical can vary by enough to affect an inside mount. If the design calls for several shades to align visually, note the desired bracket heights and sill lines, not just each opening’s raw dimensions.
Common Measuring Mistakes to Avoid
The most common mistake is measuring the glass rather than the opening or coverage area. Glass dimensions do not tell a manufacturer where brackets will mount, how much room is available for the roller, or how the shade should overlap.
Another frequent error is taking one measurement and rounding aggressively. Record every measurement to the nearest 1/16 inch, then provide the dimensions exactly as requested. Never assume a smaller size is safer. With custom shades, the correct adjustment depends on the hardware system and mounting condition.
Homeowners also overlook obstructions. A protruding lock, a plantation shutter frame, a security sensor, or a window crank can turn a theoretically correct measurement into an unusable installation. Photographing the opening and noting these details alongside your measurements can prevent surprises.
Finally, do not measure a large shade alone if it is difficult to hold the tape level. For wide living-room windows, commercial storefronts, or tall stairwell glass, a second person improves accuracy and safety. These installations can also involve ladder work, specialty brackets, and power routing that are best handled by a trained team.
When Professional Measurement Is the Better Value
DIY measuring works well for straightforward windows and manual shades. It becomes less reliable when the project includes motorization, recessed pockets, blackout requirements, angled ceilings, very large openings, exterior screens, or integrated smart-home controls.
A professional measure confirms more than dimensions. It verifies mounting surfaces, roller clearance, fabric orientation, power needs, signal reliability, and sightline alignment across an entire room. For builders, contractors, clinics, and hospitality spaces, it also helps prevent delays caused by incorrect specifications or inconsistent installations.
ShadeoTech approaches measurement as part of the finished system, from local custom manufacturing through installation and automation setup. That level of coordination matters when shades need to look refined, manage Texas sun, and operate reliably every day.
Take careful measurements, keep every number unrounded, and let the chosen shade system dictate the final tolerances. When the fit is right, a roller shade becomes one of the quietest upgrades in a room: it simply controls light, comfort, and privacy exactly when you need it.
