

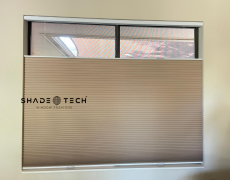

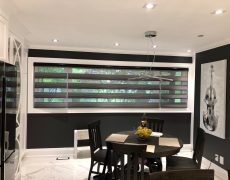
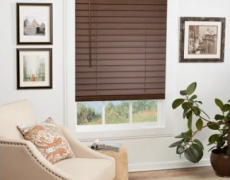
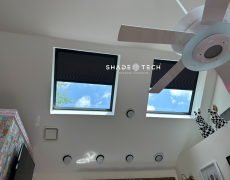


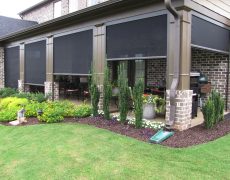




A custom blind can only perform as well as the dimensions behind it. Knowing how to measure custom blinds correctly helps prevent side gaps, bracket interference, light leakage, and a finished look that feels slightly off. For Dallas-Fort Worth homes with expansive glass, intense western sun, and automated shade systems, accurate measurements are also the starting point for better heat control, UV protection, and dependable daily operation.
The first decision is not the width or height. It is the mount type. An inside mount fits within the window opening for a clean, architectural appearance. An outside mount installs on the wall, trim, or surrounding surface and extends beyond the glass to improve light coverage. Each requires a different measurement approach, and the right choice depends on window depth, trim, obstructions, privacy needs, and the shade style you select.
Before You Measure Custom Blinds
Use a steel tape measure rather than a cloth tape or ruler. Measure in inches to the nearest 1/8 inch, record every dimension exactly, and label each window by room and location. Even windows that look identical often vary by a fraction of an inch, particularly in custom-built homes, remodeled spaces, and older commercial properties.
Measure each opening independently. Do not assume the windows in a bank share the same dimensions. Also note anything that could interfere with the shade: window cranks, security sensors, handles, decorative molding, tile returns, vents, or nearby doors. A measurement may be technically accurate yet still produce the wrong solution if these details are overlooked.
For motorized blinds and smart shades, identify the nearest power source and consider where the charging port, battery tube, motor head, or concealed wiring will sit. The measured opening is only one part of a well-planned automated window treatment.
How to Measure Custom Blinds for an Inside Mount
Inside-mounted blinds and shades sit within the window recess. They are a strong fit for contemporary Dallas interiors, especially where homeowners want to preserve clean trim lines and highlight large window openings. The opening must have enough unobstructed depth for the selected product and mounting brackets.
Measure the width in three places
Measure the inside width at the top, center, and bottom of the opening. Record all three measurements. Window openings are rarely perfectly square, so the narrowest width is typically the controlling dimension for an inside mount.
Do not make your own width deductions unless your manufacturer specifically instructs you to do so. Custom blind fabricators account for operating clearance, bracket requirements, and product-specific deductions. Ordering the exact narrowest opening width allows the finished blind or shade to be sized correctly for the space.
Keep the tape measure straight and measure from hard surface to hard surface. If drywall corners are rounded, measure from the point where the flat surfaces begin rather than using the widest visual edge.
Measure the height in three places
Measure the opening height on the left, in the center, and on the right. Record the longest height. This gives the treatment enough length to reach the sill or lower stopping point, even if the opening slopes slightly.
For blinds that rest on a windowsill, measure from the top inside edge to the sill surface. If there is no sill, measure to the bottom inside edge of the opening. A shade that stops short can create a visible band of light, which is particularly noticeable in bedrooms, media rooms, and sun-facing offices.
Check depth before choosing the product
Depth determines whether the treatment can sit fully recessed or will project beyond the opening. Measure from the front edge of the window opening to the nearest obstruction, such as the glass, handle, crank, or screen frame.
Roller shades usually require less depth than wood blinds, cellular shades, or layered zebra shades. Motorized products may also need additional room for the roller tube and brackets. If the opening is shallow, an outside mount may provide a cleaner result than forcing a larger product into an inadequate recess.
Measuring for Outside-Mount Blinds and Shades
Outside mounts offer more flexibility because the treatment is not constrained by the opening. They are often the better choice for shallow windows, doors, irregular openings, or rooms where maximum privacy and light control matter. They can also make a small window appear larger by extending the visual line beyond the frame.
Start with the coverage width
Measure the width of the window opening, including the trim only if the treatment will cover it. Then add overlap on both sides. For many shades, 2 to 3 inches of overlap per side provides effective coverage. Wider overlap may be appropriate for blackout shades, bedrooms, west-facing windows, or spaces where sunlight enters at an angle.
The available wall space controls the final width. Check for light switches, artwork, adjacent windows, cabinet doors, or corner conditions before adding overlap. On a wide contemporary window wall, a single large shade may look streamlined, but multiple independently controlled shades can offer better operation, fabric tension, and smart-home flexibility.
Determine the mounting height and finished drop
Measure from the planned top mounting point down to where the shade should end. Mounting above the opening can reduce light gaps and create the appearance of taller windows. For a more finished look, the treatment may extend several inches above the frame, provided there is clear wall space for brackets and the rolled-up shade.
At the bottom, decide whether the blind should stop at the sill, cover the trim, extend below it, or reach the floor. Patio doors and tall windows need enough clearance to operate without dragging. In restaurants, clinics, and offices, bottom placement should also account for furniture, traffic paths, cleaning access, and local safety requirements.
Check the mounting surface
Outside-mounted shades need a stable mounting surface. Solid wood blocking, suitable framing, or properly selected anchors are essential, especially for oversized shades and motorized systems. Decorative trim is not always strong enough to carry the load.
This is one reason professional field verification matters. A specialist can confirm what sits behind the drywall, how the brackets will be anchored, and whether the wall surface supports a heavy roller, outdoor screen, or wide smart shade.
Details That Change the Final Measurement
A tape measure cannot show every installation variable. Large windows may have slight bows in the frame. Plantation shutters need clearance for louvers and tilt rods. Dual shades require room for two rollers. Exterior screens need careful assessment of side channels, mounting surfaces, and wind exposure.
Motorization adds another layer of planning. A battery-powered shade may need access for future charging or battery replacement. Hardwired shades require an electrical plan before drywall is closed or before the installation team arrives. If the shades will integrate with Alexa, Google Home, Apple HomeKit, or Matter-enabled controls, decide whether you want grouped scenes, room-based controls, sunrise schedules, or heat-management automation before selecting the system.
Fabric selection also affects performance. A darker openness fabric may preserve views while reducing glare, but it will not deliver the same room-darkening effect as a blackout material. In North Texas, solar shades can substantially improve comfort on sun-exposed elevations, yet the right openness factor depends on the room’s orientation, privacy needs, and desired view.
When DIY Measurements Are Enough and When They Are Not
A straightforward, standard-size window with an uncomplicated manual shade can be measured successfully by a careful homeowner. The risk rises with high ceilings, oversized openings, multiple adjacent shades, specialty shapes, shutters, outdoor screens, and any motorized system.
Professional measurement is especially valuable when the finished treatment is intended to disappear into the architecture. Small discrepancies become more visible on premium products, and a fraction of an inch can affect shade alignment across a wall of glass. A trained installer also evaluates operational clearance, mounting structure, control placement, fabric roll direction, and the practical details that are easy to miss from a product diagram.
At ShadeoTech, field measurement is treated as part of the product, not an afterthought. Local manufacturing in Carrollton allows the final dimensions to be translated directly into a custom-built system designed for the window, the room, and the way you plan to live or work in it.
A careful measurement gives custom blinds their clean fit, but the best result comes from viewing the window as a complete system: architecture, sunlight, privacy, mounting conditions, and control. Measure precisely, document what surrounds the opening, and let the finished treatment earn its place every day.
